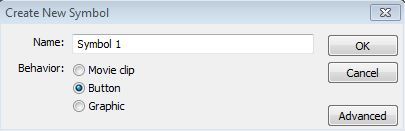
Flash - Designing a Flash buttonFlash buttons are great for hyperlinks - links to a URL - but are pretty useless for in-site navigation if you have several links and wish to organise your pages in folders. Putting the pages in folders means the Flash button has to link to another level in the site and it won't let you do that. Buttonscontainers are not as 'pretty' but they are far more useful in this context. In this lesson we are going to design a Flashbutton. Open a new Flash document and call it 'button'. Save it. Select Insert from the top menu and click on 'New Symbol'. When the dialogue box opens select 'Button' for its behaviour.
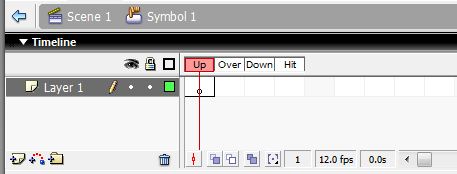
A page will open for that symbol...
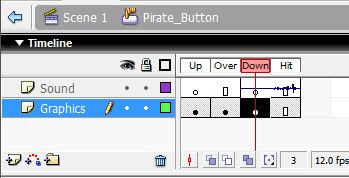
You can now insert graphics for when the button is up, moused over, pressed down and hit. You can have the same graphic for all stages - but it is fun to have the button change when you mouseover it as this is a good visible sign for the user. The design of the button is up to you... I intend to show you a simple graphic one that might be fun. To design the graphic I like to use Fireworks... there are more fill options in that program. Open Fireworks up and get a 500 x 500 canvas up on your screen.
You then do an inner section - for that I have again used a gradient - but this time a radial one - to give the effect of a backlit transparent screen. To finish it off I have added a graphic of the skull and crossbones - to go with the pirate theme of the project. You could add a graphic or text or just leave the button without anything at all on the screen. This will be my basic button. Click on the black arrow tool - the selection tool. Select the whole of your button and copy it. Paste a copy on your canvas.Now open a new canvas screen and paste it on there. You can then save it.
The two graphics can then be uploaded to the Flash Document. I called them 'skullbutton1' and 'skull button2', therefore when I uploaded the first button to the firstframe the computer recognised they were related and asked if I would like the second one uploaded! It then inserted a keyframe in place and imported my second graphic in the right place. I then needed to inset a frame in the 'hit' frame and to rename that layer as 'graphics'.
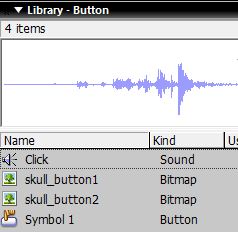
We now need to add the sound. Insert a layer (Insert - Timeline - Layer) and call it sound. You now need a sound for when the button has been pressed. After finding a sound - upload it to the library Then put a keyframe at 'down' on both layers (it needs to 'click' when the button is pressed not just passed over!). You can then drag your sound onto the screen and your button is complete!
You will have a blank canvas -but in the library you should have your two graphics, your sound and your button - called symbol 1. Name your button. For a project you will probably need several buttons. Designing your own makes it more fun and gives you more flexibility! I suggest you keep your buttons in a flash document for future projects. You can then drag it onto the screen and test you button by 'testing the movie' Try out my button below - mouse over and click it. What do you think? Hope you like it.
Now you have made your own button learn how to link it to a web address. Or i you found the idea of designing your own buttons too daunting you could use copyright free parts to assemble your own button - and then add your own logo to it... .
|
|

Custom Search
 Choose a shape for your button - I have chosen a rounded rectangle. Draw a shape and fill it with whatever colour you would like to form the border of your button. I have chosen a silver linear gradient fill - I think it looks like a metal button fixing.
 Go back to the first screen and amend one copy to make the mouseover version of the button. I have only amended the teal screen - I have simply swapped the dark and light colours around.
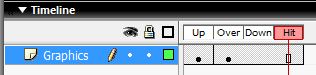
 Click on 'Scene1' - just above the timeline - to return to the main screen.